Interesting experiments for children at home will allow you to lure your baby to interesting activity, as well as stimulate his cognition and desire to learn new things. Various experiments can be carried out from the moment when the child is able to perceive information or at least carefully observe the process. The optimal option for the simplest experiments is the age of 2 years, after which, following the growth of the child, you can complicate the experiments and involve your child in helping.
Modern science for children and parents allows you to use available materials to conduct various experiments at home. Children in the world of science will be able to better learn all the features of what is happening around them, as well as learn a lot of useful and interesting things for themselves. Science through the eyes of children will take on a completely different look, and simple and funny manipulations carried out during all procedures will certainly interest your child, and he will be happy to take part.
Simple science: experiences and experiments for children
Experiments for children aged 5-7 years will be the optimal solution for a great time with your baby. Begin school years and vaccinating with the help of various interesting “tricks” will be a good solution. Entertaining science carried out at home opens up a completely different world for a child, in which seemingly simple things turn into something unimaginable.
Simple scientific activities for children of different ages will allow your child to better understand the characteristics of different substances, their combinations and will arouse a healthy interest in learning new things, but for now we bring to your attention 6 experiments that can be carried out at home.
Chemical experiments for children are an important point, because you can not only discover something new for your child, but also explain the peculiarities of behavior with different substances and the precautions that should be taken. We present to your attention 3 chemical experiments that can be carried out at home.
Non-Newtonian fluid
A fairly simple experiment that requires only water and starch. You can use any color of food coloring to add color. It is necessary to mix water with starch in a ratio of 1 to 1. The result is a substance that, in its calm form, retains all the characteristics of water, but when struck or attempted to break, it acquires characteristics more characteristic of a solid body.

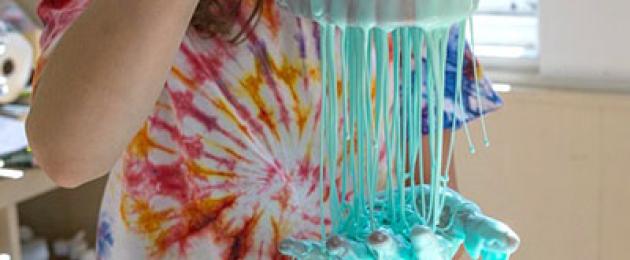
Turning milk into a cow
An interesting experiment using milk and vinegar. Milk should be slightly warmed in the microwave or on the stove, without bringing to a boil. After this, add vinegar to the container with milk and begin to actively mix. After some time, clots begin to form, consisting of casein, a protein found in cow's milk. If there is a large accumulation of these clots, you should strain the liquid, and collect the collected casein clots into one, from which you can sculpt a figurine of a cow or any other object. After drying the product, after a few days you get a durable toy made of natural material with hypoallergenic characteristics.

"Elephant Toothpaste"
An impressive experiment that evokes a sea of positive emotions and delight in the child. To carry it out you will need hydrogen peroxide (6%), dry yeast, liquid soap, food coloring and some water. To get the effect, you need to add yeast to a mixture of water, soap and peroxide. The exothermic reaction caused by this will lead to an instant expansion of the resulting mixture, which will immediately flow out of the container like a fountain. To keep your home clean, it is better to conduct this experiment outside, because the height of the jet can reach several meters.

However, chemicals are not the only thing you can use to please your children. There are also experiments for children in such fields of science as physics. We have prepared 3 of the simplest ones especially for you.
Leaky package
To carry out the experiment, all you need is a regular bag, a little water and a few sharp pencils. You need to fill the bag with water and tie it tightly. After this, the moment of true surprise for your children comes when, having completely pierced the bag with a pencil, water will not flow from it. This is due to the fact that polyethylene is a fairly elastic material and can envelop a pencil, preventing water from leaking out.

Frozen soap bubble
To implement this idea, you will need a regular soap bubble and suitable weather conditions (preferably -15 degrees). The child will be able to observe how quickly an ordinary bubble replaces its state of aggregation, freezing and taking on a completely different appearance.

color tower
All you need is water, sugar and various food colorings. By mixing water and sugar in different proportions, you get mixtures of different densities, which allows them not to mix with each other in one vessel, thus creating a tower of different colors.

You can also learn a lot of interesting things by watching the program simple science, exciting experiments for children, videos of which we have already prepared for you.
On the hack
Materials and equipment: Bucket, ball, rope tied to the handle of the bucket.
Progress of the lesson
Children put a ball in a bucket. They find out with the help of actions what will happen if the bucket is turned over (the ball will fall out), why (gravity acts). An adult demonstrates rotating the bucket using a string (the ball does not fall out). Children are led to the conclusion: when objects spin (move in a circle), they do not fall. The same happens with planets and their satellites. As soon as the movement stops, the object falls.

Straight or in a circle?
Objectives: Determine what keeps satellites in orbit.
Materials and equipment: Paper plate, scissors, glass ball.
Progress of the lesson
An adult invites children to solve a problem: what would happen to a satellite (for example, the Moon) if the planet did not attract it (earth gravity). Conducts an experiment with the children: cuts a paper plate in half and uses one half; places a ball in it, places it on the table and tilts it slightly so that the ball quickly rolls along the notch in the plate. Children find out what is happening (the ball rolls off the plate and moves away from it in a straight line), and conclude: objects move in a straight line if no force acts on them. The Moon would also move away from the Earth in a straight line if Earth's gravity did not keep it in a circular orbit.
Flattened ball
Objectives: Establish why Earth flattened from the poles.
Materials and equipment: A piece of colored craft paper 40 cm long, scissors, glue, hole punch, ruler, pencil.
Progress of the lesson
Children determine what our planet (Earth) is called, what shape it is (round), what movements it makes (rotates), from what sources people can learn about the planet (from books, from photographs from space). The adult explains that the globe is slightly flattened at the poles, demonstrating this through experience. He offers a ready-made model, explains its design (a pencil is the earth's axis, paper strips glued together in the form of a circle represent the globe when rotated). Rotates a pencil with a ball attached to it between the palms, moving them back and forth. Children find out what is happening (during the rotation of the ball, its upper and lower parts are flattened, and the central part is inflated), and with the help of an adult they explain (a force acts on the rotating ball, tending to inflate the paper strips to the sides, and because of this, the upper and the lower parts are flattened). Like all rotating balls, our Earth is also flattened at the poles and inflated at the equator. If you measure the circumference of the Earth along the equator and through the poles, then along the equator it will be 44 km larger. Then the adult and the children make a model: measure and cut out two paper strips measuring 3 x 40 cm; put them crosswise and glue them together. Then they connect the four free ends and also glue them together - you get a ball. When the glue dries, make a hole in the gluing area and insert a pencil 5 cm into it.
Dark space
Objectives: Find out why it is dark in space.
Materials and equipment: Flashlight, table, ruler.
Progress of the lesson
Children find out through experimentation why it is dark in space. Place the flashlight on the edge of the table, darken the room, leaving only the flashlight on. They find a beam of light and try to trace it, raising their hands at a distance of about 30 cm from the lantern. They see that a circle of light appears on the hand, but it is almost invisible between the lantern and the hand. They explain why (the hand reflects the rays of light, and then they are visible). Children conclude: although rays of light are constantly coming from the Sun in space, it is dark there, since there is nothing that could reflect the light. Light is visible only when it is reflected from an object and perceived by our eyes.
Rotating Earth
Objectives: Imagine how the Earth rotates around its axis.
Materials and equipment: Plasticine, thin pointed stick.
Progress of the lesson
An adult asks what our planet is like in shape (a ball). The globe is constantly rotating. You can imagine how this happens. An adult shows the finished model, making explanations (the ball is the globe, the stick is the axis of the Earth, which passes through the center of the ball, but in reality it is invisible). The adult invites the children to spin the stick, holding it by the long end.
Valentina Valerievna Sayasova
I bring to your attention several experiments that we did with children when studying the topic « Space» .
1. Experience "Why does a rocket fly":
Let's take balloon and let’s inflate it, but don’t tie it, but press it with our fingers.
There is air in the ball, what will happen if we let go of the ball? It will fly correctly, it will fly like a rocket up and forward. Of course, the rocket is not inflated with ordinary air, but with a flammable substance. When burned, this substance turns into gas, which escapes from the rocket and pushes it forward.
2. Experience "Why is the Sun small":
It seems to us that the sun is very small and the Earth is large. But that's not true. The sun is huge. For example, if you take a soccer ball behind the Sun, our planet will be the size of a pinhead!
Now go to the window (or standing on the street, put your finger in front of you and look at someone) (or anything) into the distance, for example a person. It seems smaller than our finger! Is it true! But it only seems! We know that the finger less than a person. But why? Man is far from us, and the Sun is very, very, very far from us. And we see him small.
3. Experience "Day Night".
Why is it day in one part of the planet and night in the other? You can take a globe or a ball, or you can become planet Earth yourself. Stand with your back to the switched on table lamp (or flashlight) in a dark room. The light from the lamp falls on your back, here the Sun illuminates the planet and it is day on this half of the Earth.

And on the other side is night. Now we are slowly turning towards the Sun Lamp (since our planet revolves around itself) and where there was night, day came and vice versa.

Literature.
Galperstein L. Ya. My first encyclopedia. - M. ROSMEN. -2003.
Astronomy is absolutely irreplaceable in raising a child. It is not surprising that children are much more interested in the starry sky than their parents. After all, adults always have no time, they are busy, they have problems and worries. But children ask a lot of the most unexpected questions and they need to be answered. Curious boys and girls are already interested not only in the Earth, the Moon and the Sun, but also in other planets, galaxies, and comets. Concerned parents wonder: “At what age can you start talking to your child about such an interesting science as astronomy?” Some children already at two or three years old dream of flying to the moon. And others at four years old ask their mother to read not funny fairy tales and funny stories before bed, but a completely serious book, “The Universe.” But we digress. Today in this article we want to introduce parents to several exciting experiences that your children will definitely enjoy. And, who knows, maybe, thanks to these experiments, your child will become a great astronomer and not only fly to the Moon, but also discover a new unknown planet.
Day-Night Experience
The main goal of this experience is to tell the child why there is day and night on our planet.
For the experiment, we only need a flashlight and a globe.
How to conduct an experiment:
- Take your child into a room with the lights off and point the flashlight at the globe. Explain to him that conventionally you will consider the flashlight to be the Sun, and the globe to be the Earth. In those places of the Earth where the sun's rays (light from a lantern) fall, it is light, it is day there. And where they don’t reach is night, because it’s dark there.
- Now turn the globe sunlight will illuminate other areas of the earth. Find your region or city on the globe and ask your child to make it become day and then night in your city. Ask your child what time of day it is at the border between light and dark. Children will quickly find their bearings and say: “Either early morning or evening.” Explain to your child that in our Universe all the planets and stars are in constant motion. But they do not move chaotically, but along a given trajectory. And our planet Earth rotates around its axis. This can be easily demonstrated using the example of a globe. The globe clearly shows that the earth's axis is slightly tilted. It is thanks to this that our planet has a polar night and a polar day. Give your child a globe, let him independently rotate it and play during the day and night.
- By illuminating first one and then the other part of the globe, he will be able to make sure that one pole is always dark and the other light. During the experiment, you can tell your child how people live in the polar night. Believe me, the child will be very interested.
- You can also draw the outlines of North America and Australia on a regular sheet of paper. Cut them out and stick them on the balloon. But stick them as they are actually located on our planet. Then you need to loosely tie the ball and shine a flashlight on one side of it. Release the string and let the ball fall. But fall from the height from which the paper was cut. Now turn it slowly. Try to hold the ball so that it is midnight in Australia, and North America dawn. By demonstrating this space, it is easier to explain to a child that our planet is in constant motion. People living on the other side this moment turned towards the Sun, they are greeting the dawn, and people on the other side are admiring the stars and getting ready to go to bed.
How to make a sundial - instructions
To create a sundial, purchase:
- CD packaging.
- Translucent CD.
- Sticky paper.
- Labels designed for CDs.

Instructions:
- Glue a semicircle to the bottom of the box, or rather to its inner surface, on which to mark the time zones in advance. In this case, the “0” mark should be positioned clearly horizontally.
- Carefully cut out the gray section. It is located on the insert part of the disk. Stick it on the disc.
- Determine the center in the box and drill a hole in this place. Its diameter should be approximately 2 mm.
- Attach a gnomon into the hole - a small nail without a head. A toothpick will also work. Fix perpendicular to the plane of the disk itself. The nail should protrude 20 mm in both directions.
- The CD can then be placed in the holder. Place the scale at an angle of 90 degrees latitude.
- The role of the stand can be played by the lid of the box. You just need to fold it back. You can achieve the desired slope angle by slightly trimming the edges of the box.
- Now sundial needs to be oriented. Point the carnation north. Naturally, top part The scale will be directed towards the south pole. In order for the sundial to be used, you need to mark the longitude of your city on the “map” and combine this mark with the number of the region’s time zone. The shadow of the gnomon will indicate the standard time.
How to simulate an eclipse at home - experiment
The ancient Chinese were sure that an eclipse was the result of the Dragon swallowing the Sun. In the twenty-first century, we ourselves can arrange a small home eclipse. Why are we worse than the Chinese Dragon?
For this experiment we you will need: a tennis ball, a table tennis ball and a flashlight.

Instructions:
- Place the tennis ball at a distance of 60 cm from the flashlight, and between them (in the middle) place a table tennis ball.
- Let's turn off the lights in the room.
- Turn on the flashlight and direct the beam of light at the ball, while simultaneously moving the ball around the ball.
- Now imagine that the tennis ball is the Earth, and the tennis ball is the Moon. Naturally, the flashlight is the Sun.
- Let us carefully observe what will happen when the ball (Moon) passes between the flashlight and the ball, and when it moves behind the ball (Earth).
We will see a model of a real eclipse.
Microcosm in a glass - an astronomy experience
To create a microcosm in a glass we will need : pure medical alcohol (vodka will not work), 250 mm glass, water, any vegetable oil, pipette.
Instructions:
- Pour 150 mm of alcohol into a glass.
- We take the oil into a pipette and carefully drop a large drop into a glass of alcohol.
- A drop of oil will immediately fall to the bottom of the glass.
- Look how beautiful the drop looks - a real golden ball.
- In this case, different liquids have different specific gravity, which is why they do not mix.
- Why did the oil choose the shape of a ball? Simply because it is the most economical figure. The alcohol presses on the oil from all sides, and the oil ball is (in a kind of) weightlessness.
- Now let’s turn our ball not just into an object lying at the bottom, but into a real floating planet. To do this, we need to dilute the alcohol with water. But it must be added to the glass gradually in tiny portions.
- The ball will begin to lift off from the bottom.
- Oil does not mix with water or alcohol. There will always be a border between them. But water and alcohol mix easily. The liquid in the glass changes its density, and the oil ball begins to float from the bottom.
- The result of this will be simply amazing if you add food coloring to the water in advance.
- Now you can give your child a pipette and let him add a few “planets” to outer space himself. He can independently connect several small planets into one large one, and he can divide a planet into several smaller ones. He can stir a glass with a stick and create a new planetary system.
How to make a rocket from a bottle?
This experience will allow us to simulate a pneumohydraulic model of a rocket taking off under the influence of reactive force.
For experience you will need an ordinary two-liter plastic bottle, a pump, a sealed cap, a tube for inflating air, a nipple, a frame, and a mount.
Instructions:
- We attach a plastic tube strictly vertically to the frame (wooden stand).
- Fill a regular plastic bottle 1/3 full with water.
- Place the bottle hermetically on the tube.
- We install a nipple on the bottom of the tube in advance. You can use a bicycle nipple.
- Using a pump, using a nipple, pump H2O into the bottle.
- Thanks to the air, pressure is created at the top of the bottle.
- H2O begins to push out the liquid.
- The bottle breaks off the frame.
- The flow of water rushes down, creating jet thrust. It is she who lifts the bottle up (into space - joke).
![]()
Laugh, laugh, but a rocket made from a bottle can rise to the height of a nine-story building. It’s hard to even imagine how many fans will gather to watch the rocket launch.
Canadian Stephen Leacock once said that astronomy teaches us to protect and properly use not only the Sun, but also all other planets.
And we need to learn to love, cherish and admire our Universe from early childhood.
Before the start of the thematic week, show your child a photo or presentation about the planets, the solar system, space, and read a thematic book.
- Making a rocket for space travel. A rocket can be made from chairs, pillows, boxes, cardboard, bottles, drawn, molded from plasticine, laid out from counting sticks, cubes, construction sets.
Here are some examples of “Rocket” crafts:


- Play preparing an astronaut for a flight.
The suit check begins. Does the helmet fit comfortably on your head? (Turns, head tilts to the right, left, forward, backward, circular rotations of the head).
An astronaut can move through space using a device placed in a backpack on his back. We check how tightly the backpack is held behind your back. (Circular movements, raising and lowering the shoulders).
Are the numerous zippers and buckles fastened well? (Turns and tilts of the body to the right, left, forward, backward, circular movements torso, bending towards the feet).
Do the gloves fit snugly on your hands? (Rotational movements with the hands extended forward at chest level, alternating and simultaneous swings of the arms, raising the arms up in front of oneself with alternate bending and extension of the hands, lowering them down through the sides, also alternately bending and straightening the hands).
How does the radio work? Doesn't it act up? (Half squats, jumping on two legs in place).
Are your boots too tight? (Walking in a circle on toes, heels, outer and inner feet, toe-off, side gallop to the right, left, single file step).
Is the spacesuit’s “heating system” okay? Is it easy to breathe in it? (Inhale - arms up, exhale - arms down).
- Launch the rocket.
Place a paper rocket on a cocktail straw and blow into the straw so that the rocket flies up:


Inflate a rocket balloon and tape a cocktail tube to it. Stretch the thread across the room and thread it through the tube. Now release the ball. The air will begin to come out of it, and the ball will fly.

- Getting to know the planets solar system, you can depict them in different ways- mold from salt dough or plasticine, draw with prints of cut potatoes or a cork lid, line with buttons or plasticine, make a mobile from cardboard or felt figures.

We made this drawing: we painted a starry sky by splashing white paint on black paper using a brush. Each planet separately, cut out and glued them onto the starry sky.

The moon can be drawn like this. Cut a circle out of cardboard, draw circles - craters - on it with wax crayons, and then paint over the entire Moon with watercolors.
Lantern "Constellations". Draw constellations on black cardboard, make holes in the places where the stars are located. Glue the resulting cards onto paper cupcake tins, place them on a flashlight and tie them with thread. Now light a flashlight in a dark room and point it at the wall to create a projection of the constellation.
- In contact with 0
- Google+ 0
- OK 0
- Facebook 0